https://pve.proxmox.com/wiki/VNC_Client_Access

VNC Client Access - Proxmox VE

Standard Console Access By default, PVE provides access to VMs via noVNC and/or SPICE. It is recommended to use these whenever possible. However, if you need to have browser independent access, it is possible to use an external VNC client such as RealVNC,

pve.proxmox.com


  • 요약
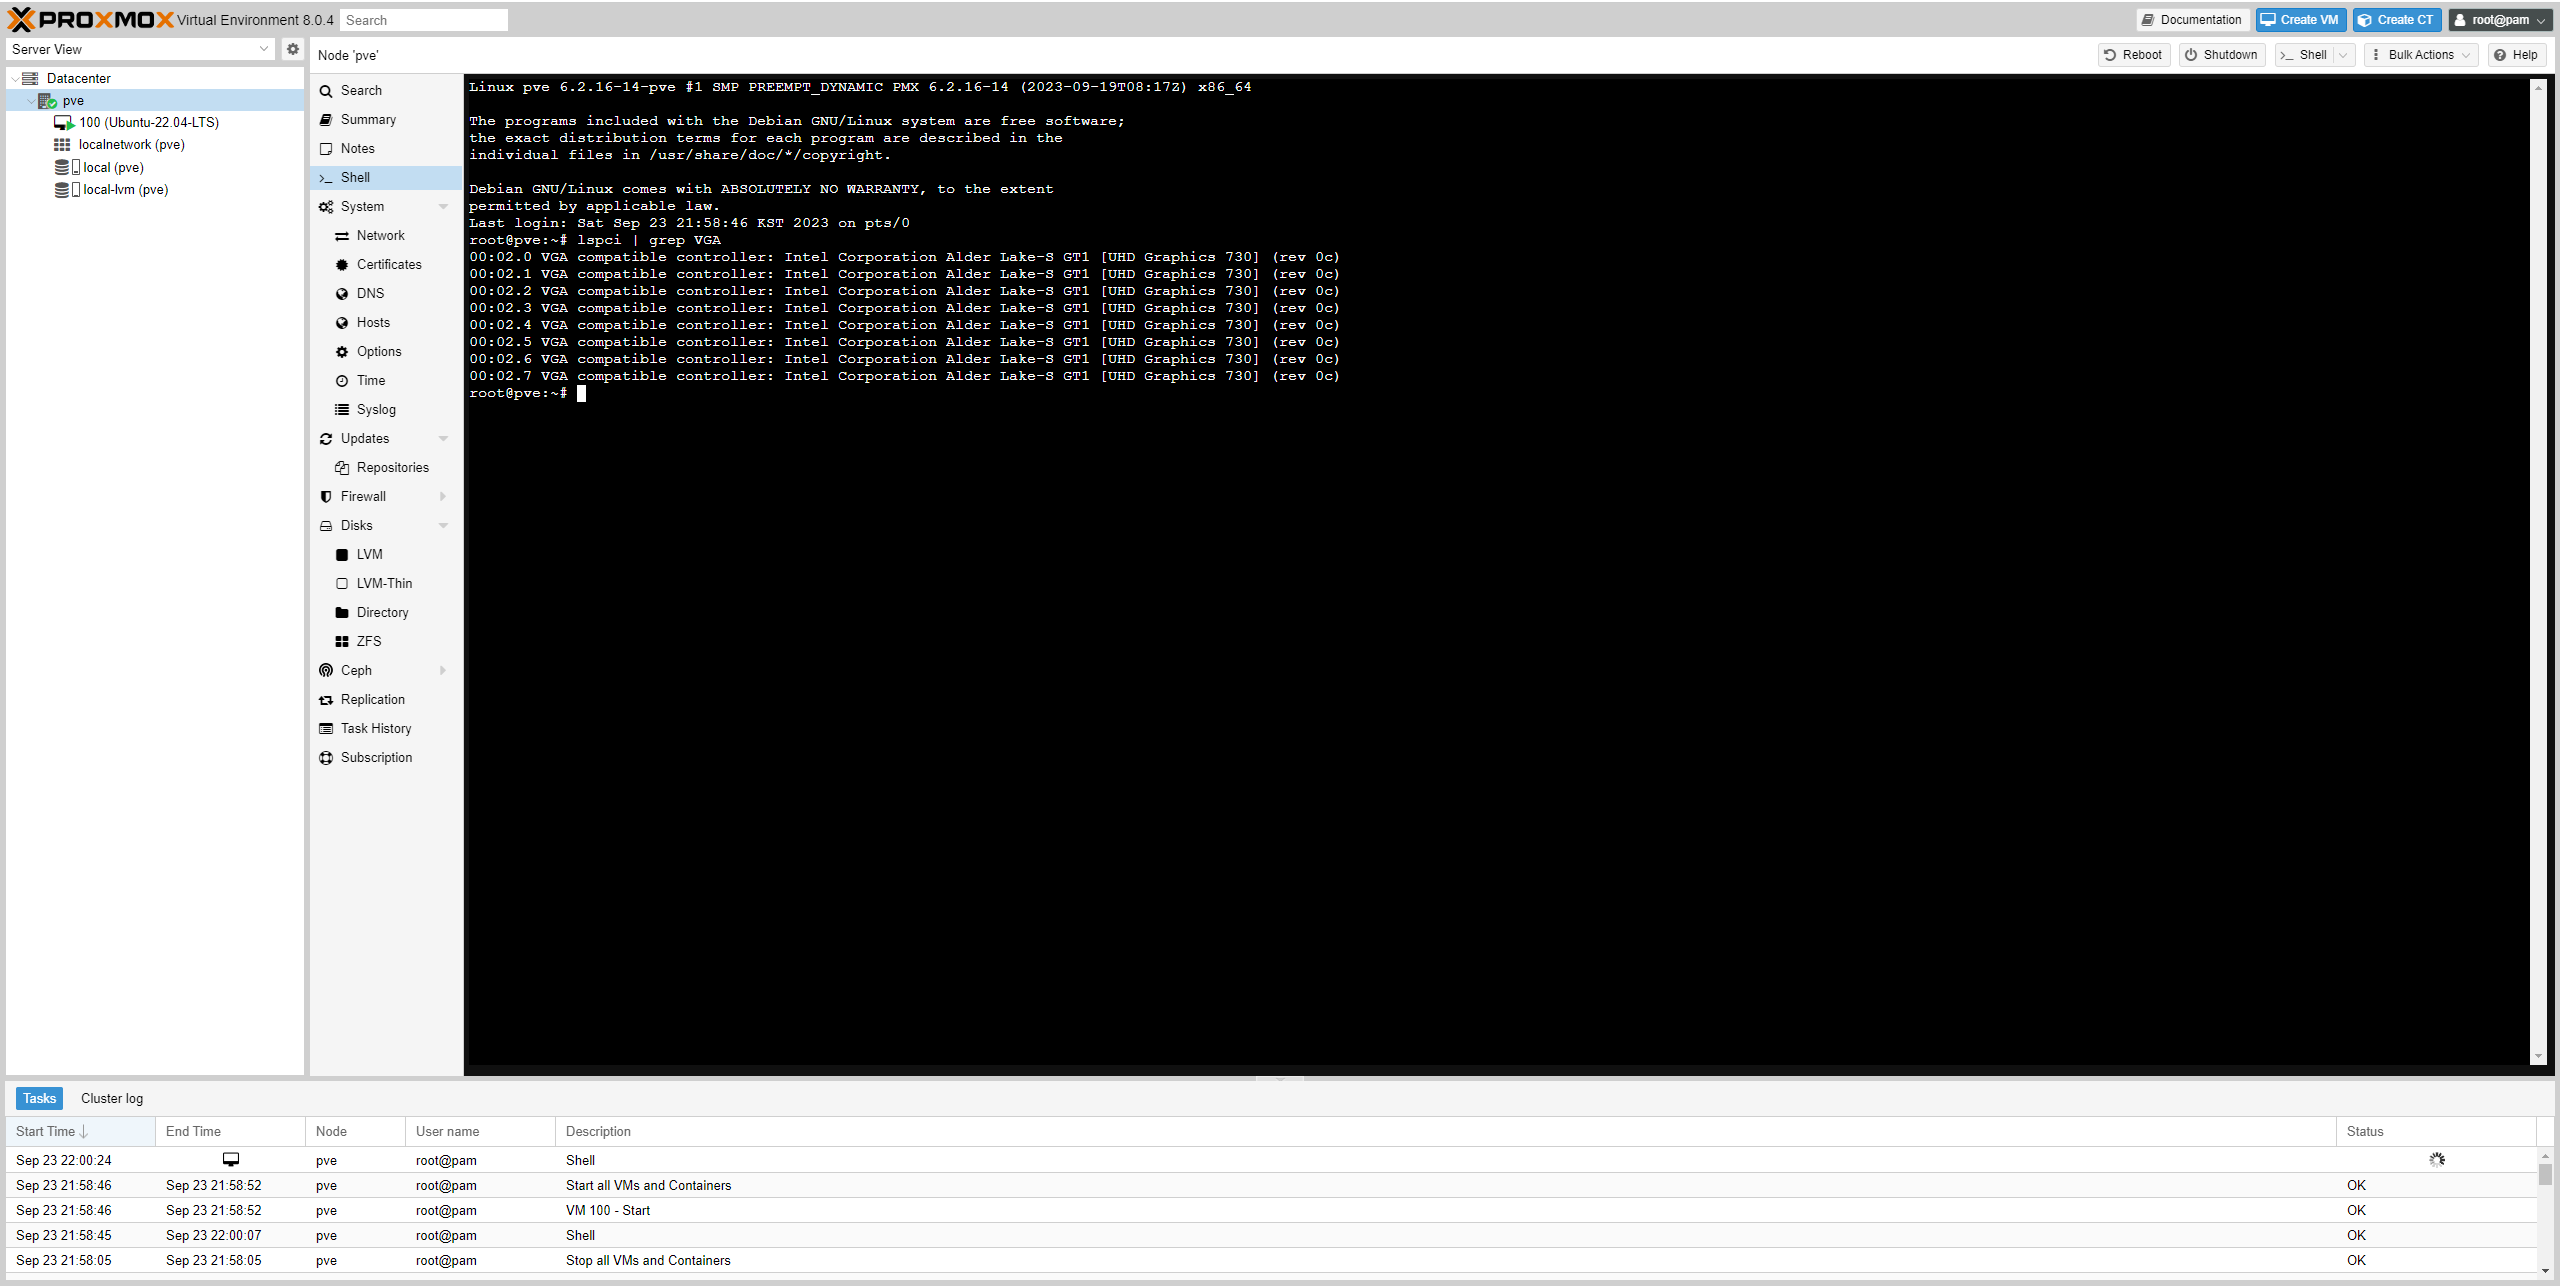
  • /etc/pve/local/qemu-server/<VMID>.conf에 아래 내용을 추가한다.
  • args: -vnc 0.0.0.0:77
  • Remminia 등 vnc client 에서 "Host IP:5977"에 접속한다.
  • The VNC service then listens at port 5900+display_number.

http://continuetochallenge.tistory.com/43


Xming(X Window) 설치 및 Putty 연동 (Step by Step)

1. Xming 다운로드 https://sourceforge.net/projects/xming/ 2. Xming 설치 Xming 설치는 특별한 설정 작업이 필요 없으며, 그냥 Next -> Next 누르면 됌 3. Xming 사용법 Xming 실행 작업표시줄에 Xming Server 실행됨 여기서

continuetochallenge.tistory.com


https://pve.proxmox.com/wiki/Passthrough_Physical_Disk_to_Virtual_Machine_(VM)


Passthrough Physical Disk to Virtual Machine (VM) - Proxmox VE

By adding the raw physical device to the Virtual machine, you can test installers and other disk repair tools that work with disk controllers like ddrescue, Clonezilla or Ubuntu Rescue Remix. NOTE: This guide is meant for QEMU/KVM based Virtual Machines, n

pve.proxmox.com


  • 요약
  • 아래 명령어 실행하면
find /dev/disk/by-id/ -type l|xargs -I{} ls -l {}|grep -v -E '[0-9]$' |sort -k11|cut -d' ' -f9,10,11,12


  • 아래아 같은 결과가 나오고
/dev/disk/by-id/ata-ST8000DM004-2CX188_ZCT1DNY1 -> ../../sda
/dev/disk/by-id/wwn-0x5000c500c35cd719 -> ../../sda
/dev/disk/by-id/usb-Generic_STORAGE_DEVICE-0:0 -> ../../sdb
/dev/disk/by-id/usb-JMicron_Generic_0123456789ABCDEF-0:0 -> ../../sdc
/dev/disk/by-id/ata-ST2000DX001-1CM164_Z1E783H2 -> ../../sdd
/dev/disk/by-id/wwn-0x5000c500661eeebd -> ../../sdd


  • 이 정보를 이용하여 아래와 같이 XPenology 에 HDD 정보를 추가 해 준다.
  • Nas의 id가 592가 아니라 다른 거라면 예를 들어 102라면 102로 바꿔 준다.
  • 나의 경우 scci로 하면 정상적으로 인식이 안되었고 sata1, sata2와 같이 sata로 설정해줘야 정상 동작했다.
qm set 592 -scsi2 /dev/disk/by-id/ata-ST3000DM001-1CH166_Z1F41BLC


  • 리부팅하고 나면 XPenology 에서 HDD를 정상적으로 인식한다.
  1. 이전 글을 그대로 따라 하면 그냥 그대로 잘 된다.
  2. https://seongwon1.tistory.com/21
 

Proxmox VE 8 에서 vGPU (VT-d/sriov) 사용하기

아래 링크의 설명대로 그대로 따라 했더니 Host 에서의 인식까지는 매우 잘 동작한다. https://www.derekseaman.com/2023/06/proxmox-ve-8-windows-11-vgpu-vt-d-passthrough-with-intel-alder-lake.html Proxmox VE 8: Windows 11 vGPU (VT-

seongwon1.tistory.com


  • 아래는 인증 영상... 
  • 무슨 설명이 더 필요하랴.

  • 소비전력은 WQHD full size 에서 47Watt, Normal mode 에서 42Watt !

아래 링크의 설명대로 그대로 따라 했더니 Host 에서의 인식까지는 매우 잘 동작한다.

https://www.derekseaman.com/2023/06/proxmox-ve-8-windows-11-vgpu-vt-d-passthrough-with-intel-alder-lake.html


Proxmox VE 8: Windows 11 vGPU (VT-d) Passthrough with Intel Alder Lake

This post covers using an Intel 12th Gen (Alder Lake) CPU with Proxmox VE 8 to do VT-d vGPU passthrough to a Windows 11 Pro VM. This enables multiple VMs on the same Proxmox host share the GPU via virtual functions (VFs). What is VT-d vGPU and how is it…

www.derekseaman.com

총 8개의 vGPU가 정상적으로 인식되었다. ㅋㅋㅋ

이제 Ubuntu Guest와 Win11Pro Guest 에서 설정해봐야 함!

https://www.derekseaman.com/2023/06/proxmox-ve-8-windows-11-vgpu-vt-d-passthrough-with-intel-alder-lake.html


Proxmox VE 8: Windows 11 vGPU (VT-d) Passthrough with Intel Alder Lake

This post covers using an Intel 12th Gen (Alder Lake) CPU with Proxmox VE 8 to do VT-d vGPU passthrough to a Windows 11 Pro VM. This enables multiple VMs on the same Proxmox host share the GPU via virtual functions (VFs). What is VT-d vGPU and how is it…

www.derekseaman.com


https://github.com/strongtz/i915-sriov-dkms


GitHub - strongtz/i915-sriov-dkms: dkms module of Linux i915 driver with SR-IOV support

dkms module of Linux i915 driver with SR-IOV support - GitHub - strongtz/i915-sriov-dkms: dkms module of Linux i915 driver with SR-IOV support

github.com


https://www.michaelstinkerings.org/gpu-virtualization-with-intel-12th-gen-igpu-uhd-730/


vGPU (SR-IOV) with Intel 12th Gen iGPU [Updated 2023]

Virtualize Intel iGPU for multiple VMs for hardware accelerated graphics and media encode/decode.

www.michaelstinkerings.org


- NAS 조립 후 바로 해 봅시다!!!

https://it-svr.com/proxmox-arpl-dsm-ds3622/


Proxmox에서 ARPL을 이용한 DS3622xs+ 설치하기.

안녕하세요. 달소입니다. 이번글은 앞서 소개해드린 ARPL을 Proxmox에 적용해서 설치하는방법입니다. https://svrforum.com/nas/347033 서버포럼 - 새로운 레드필 로더 ARPL(Automated Redpill Loader)로 빌드하기.svrf

it-svr.com

  • 난 HDD type을 scsi 대신 sata로 해야 인식이 되었음


생각했던 것보다 더 쉽게 되었다...


윈도에서 공유폴더 접근도 당연하지만 매우 잘 됨...


현재 사용 중인 DS918+ 를 완전 대체할 수 있을 것도 같으다.

시놀로지 Account는 못 쓰겠지만...


File upload log

starting file import from: /var/tmp/pveupload-e44eb75ce3c3636cb51a4a00ff7f4468
target node: server
target file: /var/lib/vz/template/iso/arpl.img
file size is: 1073741824
command: cp -- /var/tmp/pveupload-e44eb75ce3c3636cb51a4a00ff7f4468 /var/lib/vz/template/iso/arpl.img
finished file import successfully
TASK OK


+ Recent posts